
Nextjs项目实现登入登出
1.将项目推送到github
绑定远程仓库
bashgit remote add <remote - name> <remote - url><remote - name>是你为远程仓库指定的一个别名,通常使用origin(这是最常见的约定);<remote - url>是远程仓库的 URL。验证远程连接
bashgit remote -v推送本地仓库到远程仓库
bashgit push -u origin master问题:
error: failed to push some refs to 'github.com:...'这个错误是因为你的本地分支落后于远程分支,需要先将远程分支的更新合并到本地,然后再推送。bashgit pull origin master --allow-unrelated-histories
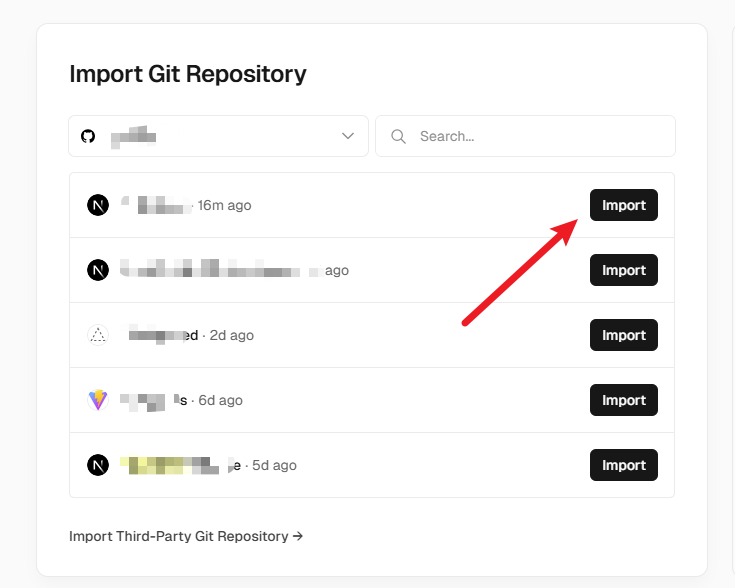
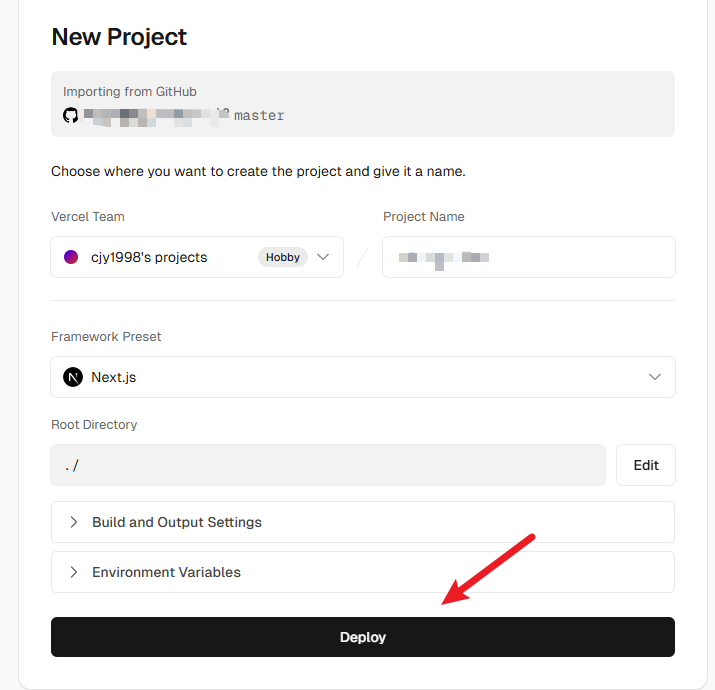
2.登录Vercel创建项目
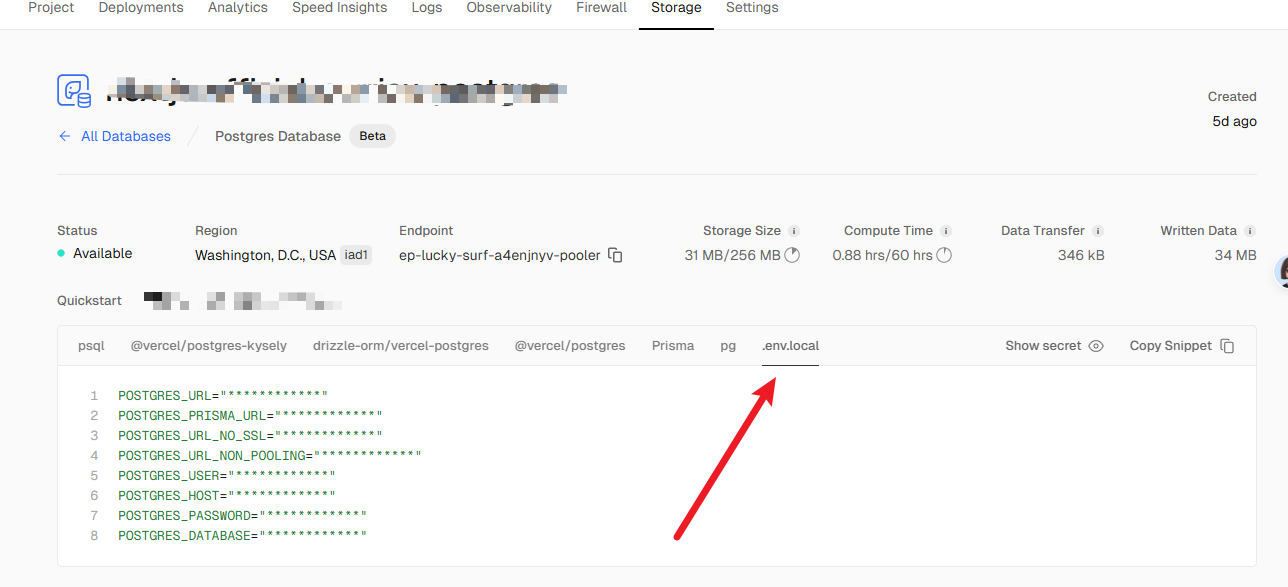
3.设置数据库
- 从项目仪表板中选择刚才新建的项目→ Storage → Create Database → Postgres → Continue
- 在
.env.local选项卡下复制密钥粘贴到项目的.env文件中。
安装
@vercel/postgresbashnpm i @vercel/postgres添加初始数据
ts// app/lib/placeholder-data.ts const link_view_users = [ { id: "410544b2-4001-4271-9855-fec4b6a6442a", name: "admin", email: "1@qq.com", password: "123456", }, ]; export { link_view_users };下载
bcrypt对密码进行加密:npm i bcryptts// app/init-database/route.ts import bcrypt from "bcrypt"; import { db } from "@vercel/postgres"; import { link_view_users } from "../lib/placeholder-data"; const client = await db.connect(); async function seedUsers() { await client.sql`CREATE EXTENSION IF NOT EXISTS "uuid-ossp"`; await client.sql` CREATE TABLE IF NOT EXISTS link_view_users ( id UUID DEFAULT uuid_generate_v4() PRIMARY KEY, name VARCHAR(255) NOT NULL, email TEXT NOT NULL UNIQUE, password TEXT NOT NULL ); `; const insertedUsers = await Promise.all( link_view_users.map(async (user) => { const hashedPassword = await bcrypt.hash(user.password, 10); return client.sql` INSERT INTO link_view_users (id, name, email, password) VALUES (${user.id}, ${user.name}, ${user.email}, ${hashedPassword}) ON CONFLICT (id) DO NOTHING; `; }), ); return insertedUsers; } export async function GET() { try { await client.sql`BEGIN`; await seedUsers(); await client.sql`COMMIT`; return Response.json({ message: "创建成功" }); } catch (error) { await client.sql`ROLLBACK`; return Response.json({ error }, { status: 500 }); } }重新启动项目访问
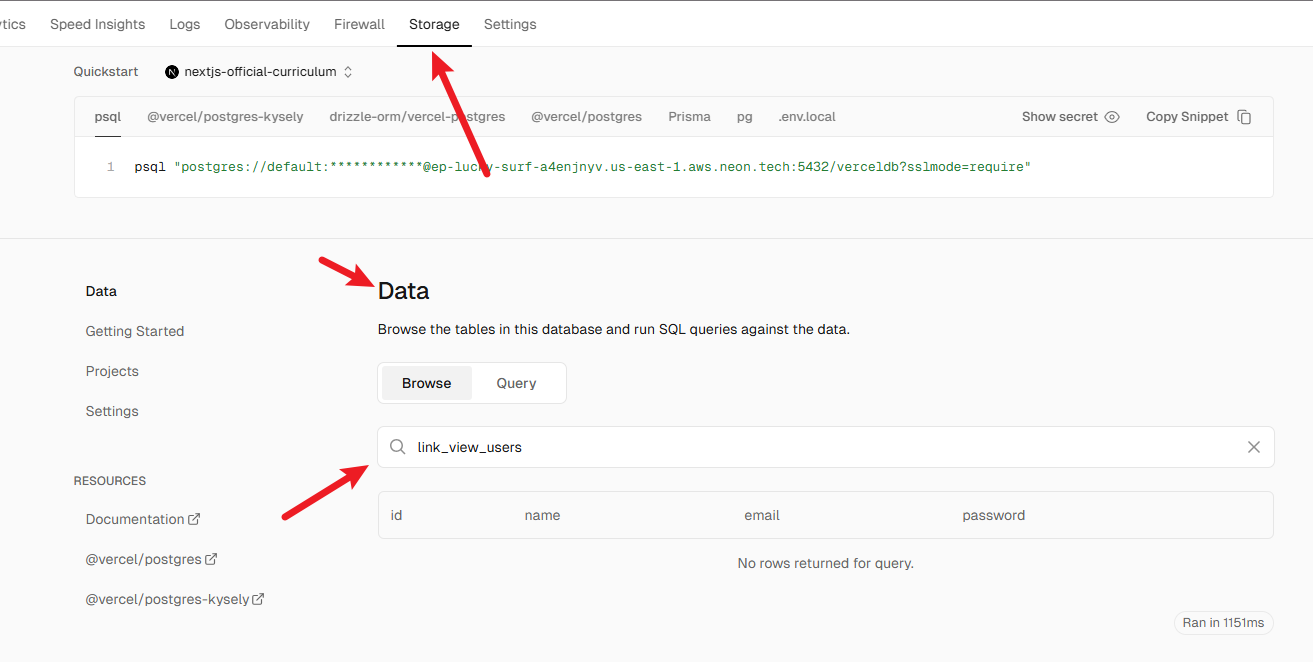
http://localhost:3000/init-database,显示 创建成功 就可以了。可以在vercel查看创建的表。
4.配置NextAuth.js实现登录
NextAuth.js 是一个为 Next.js 提供的开源身份验证解决方案。它旨在简化应用程序的用户身份验证流程,支持多种身份验证方式,如 OAuth、电子邮件和凭证登录。以下是 NextAuth.js 的核心特点:
主要功能
- 多种身份验证方式:
- OAuth:支持第三方平台(如 GitHub、Google、Facebook、Twitter 等)的 OAuth 登录。
- 电子邮件:通过 Magic Link 实现基于电子邮件的身份验证。
- 凭证登录:允许使用自定义登录表单(如用户名和密码)进行身份验证。
- 安全性:
- JWT(JSON Web Tokens):默认使用 JWT 来存储会话数据,便于无状态的身份验证。
- 加密 Cookie:支持使用加密的 HTTP-only Cookies 来管理会话,提升安全性。
- CSRF 保护:内置防护跨站请求伪造攻击(CSRF)的机制。
- 无缝集成:
- 与 Next.js 完美集成,利用其 API Routes 和服务器端渲染(SSR)功能。
- 支持与数据库(如 MySQL、PostgreSQL、MongoDB 等)集成,用于持久化用户会话。
- 易于扩展和自定义:
- 支持自定义登录页面、授权回调、身份验证逻辑。
- 提供丰富的钩子(callbacks),允许对会话、JWT、授权等进行高度定制。
首先在项目中安装NextAuth.js
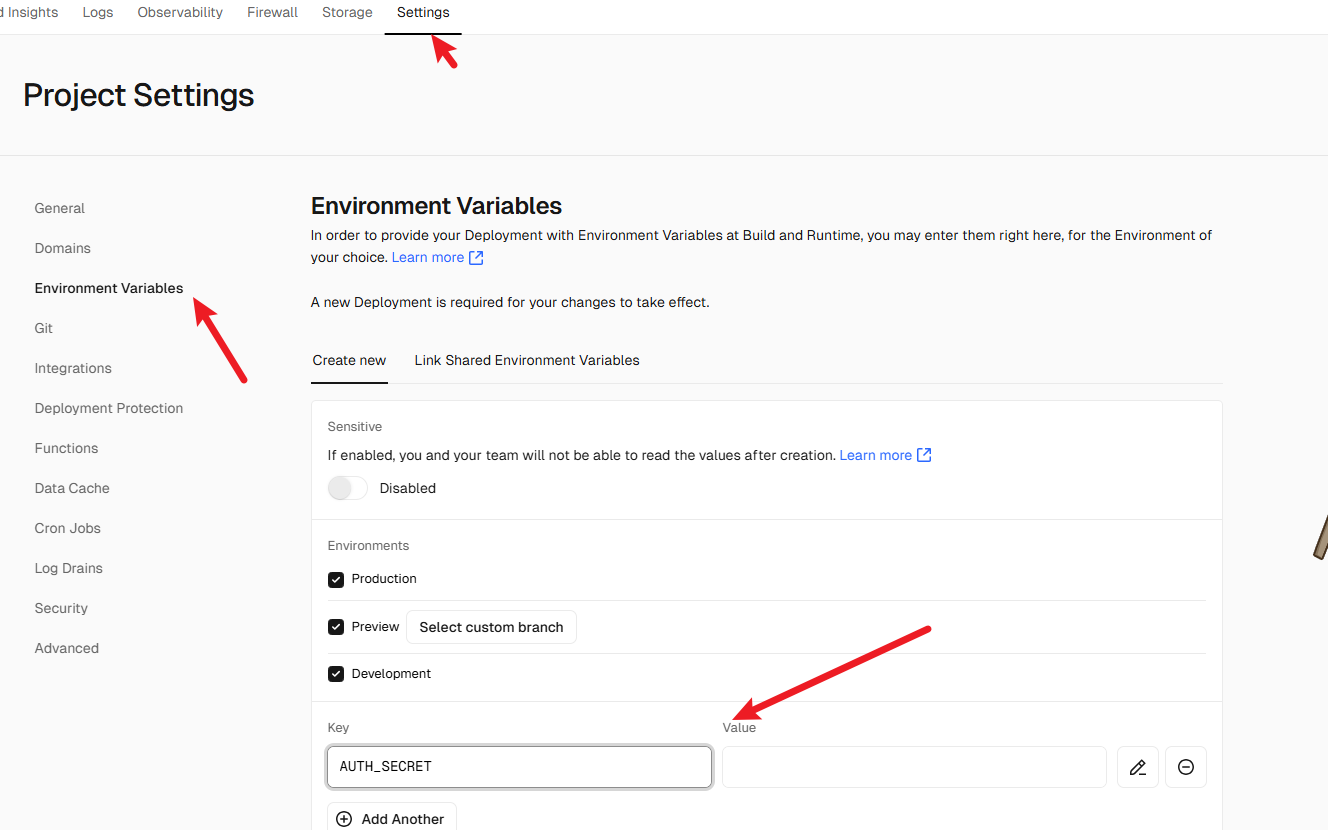
npm i next-auth@beta然后生成一个密钥,可以使用在线的base64生成工具。在.env文件中添加生成的密钥
AUTH_SECRET=密钥还需要在Vercel中配置环境变量,保证可以在生产环境使用。
在根目录新建auth.config.ts文件
import type { NextAuthConfig } from "next-auth";

export const authConfig = {
  pages: {
    signIn: "/login",
  },
  callbacks: {
    //authorized 回调用于验证请求
    //是否被授权通过 Next.js Middleware 访问页面。
    //在请求完成之前调用它,并接收具有 auth 和 request 属性的对象。
    //auth 属性包含用户的会话,request 属性包含传入请求。
    authorized({ auth, request: { nextUrl } }) {
      const isLoggedIn = !!auth?.user;
      const isOnList = nextUrl.pathname.startsWith("/list");

      if (isOnList) {
        if (isLoggedIn) return true;

        return false;
      } else if (isLoggedIn) {
        return Response.redirect(new URL("/list", nextUrl));
      }

      return true;
    },
  },
  //providers 选项是一个数组,可以在其中列出不同的登录选项。github、goole等
  providers: [],
} satisfies NextAuthConfig;
配置 NextAuth 中间件
在根目录新建middleware.ts文件
import NextAuth from "next-auth";

import { authConfig } from "./auth.config";

export default NextAuth(authConfig).auth;

export const config = {
    // 排除 `api` 路径、Next.js 静态资源和 `.png` 文件、/home
    matcher: ["/((?!api|_next/static|_next/image|.*\\.png$|home).*)"],
};其中matcher类似于路由白名单,在这个规则内的没有登录也可以访问。使用中间件的优点是在完成身份验证之前,需要登录才能访问的路由 不会开始渲染 ,增强应用程序的安全性和性能。
新建auth.ts文件
在根目录新建auth.ts文件
import NextAuth from "next-auth";
import Credentials from "next-auth/providers/credentials";

import { authConfig } from "./auth.config";
export const { auth, signIn, signOut } = NextAuth({
  ...authConfig,
  providers: [Credentials({})],
});zodZod是一个验证数据格式是否正确的工具。当你从用户输入、API请求、或者数据库中获取数据时,Zod可以帮你检查这些数据是否有效,并且自动提供TypeScrip类型提示,让代码更加安全和可靠。安装
bashnpm install zod基本用法
tsimport { z } from 'zod'; // 定义数据结构 const userSchema = z.object({ name: z.string(), age: z.number(), email: z.string().email(), }); // 现在来验证一下数据 const userData = { name: 'Alice', age: 25, email: 'alice@example.com', }; const result = userSchema.safeParse(userData); if (result.success) { console.log('验证通过:', result.data); } else { console.error('验证失败:', result.error.errors); }safeParse()方法会检查你的数据是否符合这些要求:- 如果验证成功,会返回
result.data,你就可以安全地使用这些数据。 - 如果验证失败,会返回错误信息,帮助你发现问题。
- 如果验证成功,会返回
完善
auth.ts文件tsimport type { User } from "./app/lib/types"; import bcrypt from "bcrypt"; import NextAuth from "next-auth"; import Credentials from "next-auth/providers/credentials"; import { z } from "zod"; import { sql } from "@vercel/postgres"; import { authConfig } from "./auth.config"; // 从数据库获取用户信息 const getUser = async (email: string): Promise<User | undefined> => { try { const user = await sql<User>`SELECT * FROM link_view_users WHERE email=${email}`; return user.rows[0]; } catch (error) { console.error("Failed to fetch user:", error); throw new Error("Failed to fetch user"); } }; // 配置 NextAuth export const { auth, signIn, signOut } = NextAuth({ ...authConfig, providers: [ Credentials({ // 登录验证逻辑 async authorize(credentials) { // 前端校验数据格式 const parsedCredentials = z .object({ email: z.string().email(), password: z.string().min(6), }) .safeParse(credentials); if (!parsedCredentials.success) { console.error("Invalid input:", parsedCredentials.error.errors); return null; // 验证失败,返回 null } const { email, password } = parsedCredentials.data; // 从数据库查询用户 const user = await getUser(email); if (!user) { console.log("User not found"); return null; // 用户不存在,返回 null } // 验证密码 const passwordMatch = await bcrypt.compare(password, user.password); if (!passwordMatch) { console.log("Invalid password"); return null; // 密码错误,返回 null } // 返回用户对象 return user; }, }), ], });编写接口
ts// /app/lib/service.ts 'use server'; import { signIn } from '@/auth'; import { AuthError } from 'next-auth'; // ... export async function authenticate( prevState: string | undefined, formData: FormData, ) { try { await signIn('credentials', formData); } catch (error) { if (error instanceof AuthError) { switch (error.type) { case 'CredentialsSignin': return 'Invalid credentials.'; default: return 'Something went wrong.'; } } throw error; } }登录表单页面
tsx"use client"; import { Button } from "@nextui-org/button"; import { Input } from "@nextui-org/input"; import Link from "next/link"; import { FaHandsClapping } from "react-icons/fa6"; import { FaGoogle, FaGithub } from "react-icons/fa"; import { IoLogoWechat } from "react-icons/io5"; import { Modal, ModalContent, ModalHeader, ModalBody, useDisclosure, } from "@nextui-org/modal"; import { useState } from "react"; import ForgotPasswordForm from "./forgot-password-form"; import { authenticate } from "@/app/lib/service"; const initialState = { message: "", }; export default function LoginForm() { const { isOpen, onOpen, onOpenChange } = useDisclosure(); const [formData, setFormData] = useState({ email: "", password: "", }); async function handleSubmit() { const data = new FormData(); data.append("email", formData.email); data.append("password", formData.password); // 调用你的 authenticate 函数 const result = await authenticate(null, data); } return ( <div className="mx-auto w-full max-w-md"> <div className="mb-5 flex items-center gap-2"> <h1 className="text-2xl font-bold">欢迎回来</h1> <FaHandsClapping className="text-4xl text-yellow-500" /> </div> {/* action={formAction} */} <form className="w-full"> <Input isRequired className="mb-5" defaultValue="example@example.com" label="Email" placeholder="Enter your email" type="email" value={formData.email} onChange={(e) => setFormData((prev) => ({ ...prev, email: e.target.value, })) } /> <Input isRequired autoComplete="current-password" label="Password" placeholder="Enter your password" type="password" value={formData.password} onChange={(e) => setFormData((prev) => ({ ...prev, password: e.target.value, })) } /> <div className="flex w-full justify-end gap-1 p-4"> <p className="cursor-pointer text-primary" onClick={onOpen}> 忘记密码?{" "} </p> </div> {/* aria-disabled={isPending} */} <Button className="w-full" color="primary" variant="shadow" onClick={handleSubmit} > 登录 </Button> {/* <p aria-live="polite" className="not-sr-only"> {state?.message} </p> */} <div className="my-8 flex items-center"> <div className="h-[1px] flex-1 bg-default-200" /> <span className="px-3 text-sm text-default-400">Or</span> <div className="h-[1px] flex-1 bg-default-200" /> </div> <Button className="mb-4 w-full" color="default" startContent={<FaGoogle />} > 使用Google登录 </Button> <Button className="mb-4 w-full" color="default" startContent={<FaGithub />} > 使用Github登录 </Button> <Button className="mb-4 w-full" color="default" startContent={<IoLogoWechat />} > 使用微信登录 </Button> <div className="flex justify-end"> <p className="text-default-400">没有账号?</p> <Link href="/register"> <p className="text-primary">去注册</p> </Link> </div> </form> <Modal isOpen={isOpen} onOpenChange={onOpenChange}> <ModalContent> {() => ( <> <ModalHeader className="flex flex-col gap-1"> 找回密码 </ModalHeader> <ModalBody className="py-8"> <ForgotPasswordForm /> </ModalBody> </> )} </ModalContent> </Modal> </div> ); }
5.实现退出登录
// /app/components/exit-button.tsx
import { Avatar } from "@nextui-org/avatar";
import { Popover, PopoverContent, PopoverTrigger } from "@nextui-org/popover";
import { IoMdExit } from "react-icons/io";
import { Button } from "@nextui-org/button";

import { signOut } from "@/auth";

const ExitButton = ({ name }: { name: string }) => {
  return (
    <div className="">
      <Popover placement="bottom">
        <PopoverTrigger>
          <Avatar isBordered className="h-8 w-8 cursor-pointer" name={name} />
        </PopoverTrigger>
        <PopoverContent>
          <form
            action={async () => {
              "use server";
              await signOut();
            }}
          >
            <Button
              className="bg-white"
              endContent={<IoMdExit className="text-2xl" />}
              type="submit"
            >
              退出
            </Button>
          </form>
        </PopoverContent>
      </Popover>
    </div>
  );
};

export default ExitButton;